Published: 08-09-2016
Overview
The LAMP stack consists of Linux, Apache, MySQL and PHP. Vagrant will be used to host the environment to prevent it from clogging up my machine. First everything will be installed manually, then it will be converted to install from a simple provisioning script.
Getting Vagrant Ready
To get a virtual machine up and going a new vagrant file needs to be created.
mkdir lamp
cd lamp
vagrant init
Add Ubuntu box
If on a new machine or just using a new image, a distribution will need to be downloaded.
# Download Ubuntu Precise Pangolin (12.04 LTS)
vagrant box add hashicorp/precise64

# In Vagrantfile add
Vagrant.configure("2") do |config|
	config.vm.box = "ubuntu/trusty64"
end
Check it works
Bring up the virtual machine quickly to check all is working:
# Start virtual machine
vagrant up

# SSH into machine
vagrant shh

# Hopefully this happens
Welcome to your Vagrant-built virtual machine.
Last login: Fri Sep 14 06:23:18 2012 from 10.0.2.2
vagrant@precise64:~$

# Used ctrl-d to logout and close the ssh connection
vagrant@precise64:~$ logout
Connection to 127.0.0.1 closed

# Destroy virtual machine
vargrant destroy
Generally you would use Vagrant and a shell script/provisioner to provision the machine. The alternative would be to set the machine up a save a snaphot of it, this isn't very flexible though, it's harder to make provisioning changes later. First the machine will be set up manually while logging the commands used. Once setup correct these commands will be used to create a shell script for automatic provisioning.
Add networking
One important thing to do before starting the manual provision is to open (forward) a port so the Apache served web page (to be built) can be viewed. To forward a port:
# In Vagrantfile add the netwroking line
Vagrant.configure("2") do |config|
	config.vm.box = "hashicorp/precise64"
	config.vm.network :forwarded_port, guest: 80, host: 5000
end

# If you destroyed the machine previously, bring it up again
vagrant up

# If the machine is still running use reload to re-boot the machine
vagrant reload
Installing LAMP Stack
First make sure the package manager is up to date:
sudo apt-get update
Apache - the server
Apache is the most common web server in the wild. It's Apaches job to response to resource requests made by clients, and generally return things like static files or dynamic content. Dynamic content can be generated using the CGI (Common Gateway Interface). The CGI is used as a way for Apache to communicate with external content generating programs such as PHP/Perl/Python.
Installing
Installing Apache using apt-get is as simple as:
sudo apt-get install apache2
Apache will automatically start-up on port 80. Using the port forwarding set earlier that's port 5000 on the host machine: localhost:5000. it should look something like this:

Apache will by default start-up on port 80. Using the port forwarding set earlier that's port 5000 on the host machine: localhost:5000. it should look something like this:
Configuration
Apache configuration files are normally found in /etc/apache2/ (Ubuntu/Debian). The main configuration file is apache2.conf. To check whether the configuration files syntax is okay use apache2ctl -t. The main configuration file reference other configuration files using include statements. To have a quick look at what other files the main config file is including try running grep "Include" /etc/apache2/apache2.conf. The Apache daemon can be controlled in the following ways:
# Use
sudo service apache2 <command>

# Or
sudo /etc/init.d/apache2 <command>

# Where <command> can be:
start
stop
restart
reload
status
Apache is commonly used for virtual hosting, where multiple sites are hosted on the same server. On Debian/Ubuntu systems common practice is to avoid editing the base configuration and instead put the virtual hosts in /etc/apache2/sites-enabled/ and then include them in the apache2.conf file.
MySQL
MySQL is a bit more of a pain to install. It requires a root password to be set interactively during installation. This is not a problem when installing it manually, but later when all the commands are placed in a provisioning shell script it will require a bit of extra work. Installing is as simple as:
sudo apt-get install mysql-server
It is recommend that the MySQL database is secured after installation. This is done to remove things like anonymous logins and test databases etc. To carry this out run the following script and follow the recommended instructions:
sudo mysql_secure_installation
PHP
PHP stands for PHP Hypertext Preprocessor (a recursive acronym). It is interpreted language commonly used in web development for server-side scripting. It can be installed using:
# Install
sudo apt-get install -y php5 php5-mysql php5-mcrypt

# Enable mcrypt in Apache
sudo php5enmod mcrypt
To change the order that Apache uses to execute files so that index.php is used over index.html it is necessary to change the /etc/apache2/mods-enabled/dir.conf file like so:
# Open Apache mods file
sudo nano /etc/apache2/mods-enabled/dir.conf

# Add index.php to the start of the list
# So it looks like this

<IfModule mod_dir.c>
    DirectoryIndex index.php index.html index.cgi index.pl index.xhtml index.htm
</IfModule>
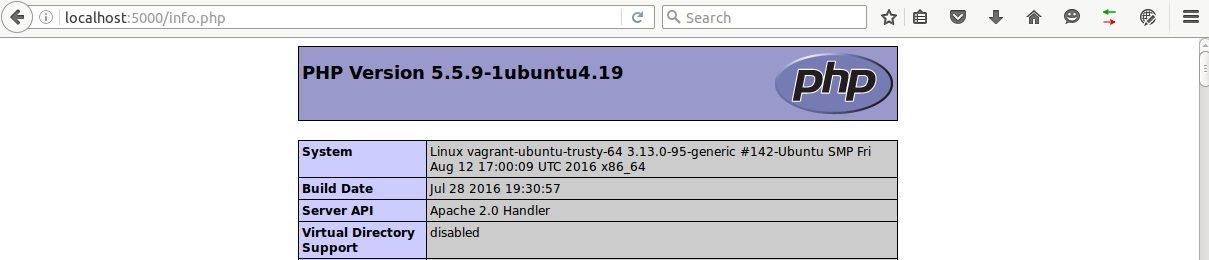
Setting up a simple PHP page can be used to check whether everything is working. Add the follow file /var/www/index.php containing:
<?php
	phpinfo();
?>
Opening the root URL should result in:
phpMyAdmin
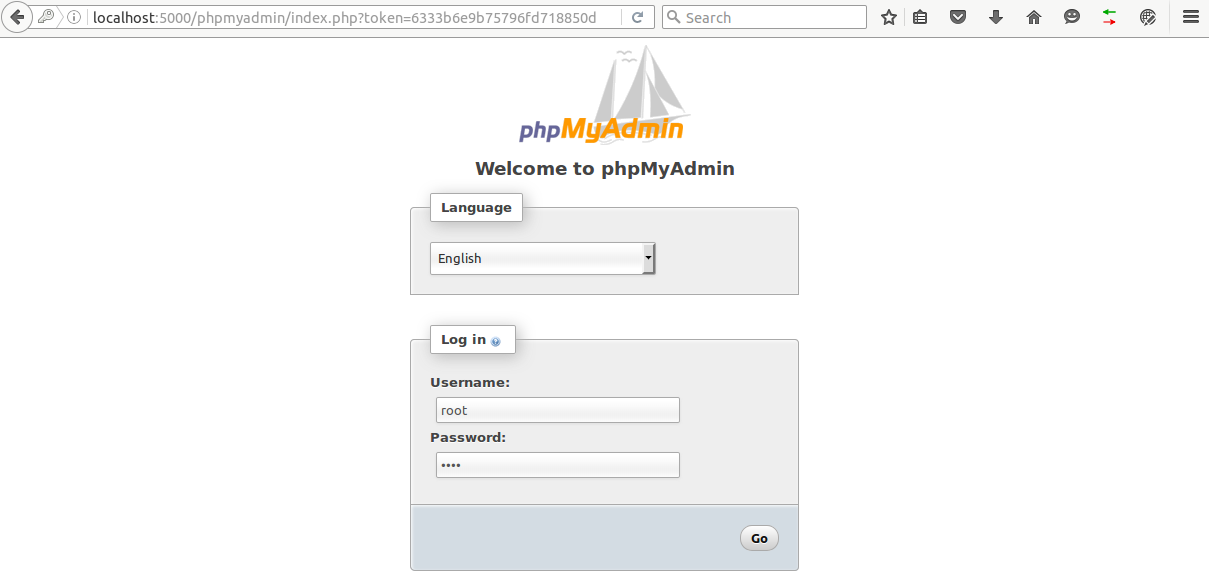
To make it easier to setup the database and just generally check what's going on phpMyAdmin can be used. It provides a web interface for managing the MySQL database. This can be handy for initially setting up a database, managing accounts or even learning and trialling SQL commands. To install phpMyAdmin:
sudo apt-get install -y phpmyadmin
The installer asks a few questions. Apache2 should be selected as the sever. Choose Yes when asked whether to configure the phpMyAdmin database. Then enter a few passwords. To be able to login to the phpMyAdmin interface Apache needs to know about it. phyMyAdmin automatically creates a symlink /etc/apache2/conf-enabled/phpmyadmin.conf which points to the config file. The phpMyAdmin config file sets up an alias at /phpmyadmin which redirects to the phpMyAdmin interface. Now the url localhost:5000/phpmyadmin should bring up the interface. Login using root and the password entered during the setup.
It's normally a good idea to secure this URL if it's going anywhere near the public. This can be done in the main config file. People tend to add a .htaccess file but this is only required if you don't have access to the main config file. The Apache docs explain why you should avoid using a .htaccess file. To create a password and add it to the config file do the following:
# Create the password - following the prompts
# Replacing username with your username
sudo apt-get install apache2-utils -y
sudo htpasswd -b -c /etc/phpmyadmin/.htpasswd tom test

# Open the phpMyAdmin config file (using the linked version here)
sudo nano /etc/apache2/conf-enabled/phpmyadmin.conf

# Add the following the the /ust/share/phpmyadmin directory
<Directory /usr/share/phpmyadmin>
        Options FollowSymLinks
        DirectoryIndex index.php

        ...
        AuthType Basic
        AuthName "Restricted Files"
        AuthUserFile /etc/phpmyadmin/.htpasswd
        Require valid-user
        ...

</Directory>
Provisioning vagrant with a shell script
A Vagrant virtual machine can be provisioned in a bunch of ways from a simple shell script to provisioners like Chef/Puppet/Ansible and even Docker containers. The following example uses a shell script and requires the least extra knowledge.
Apache
Installing Apache is easily scriptable:
# Install Apache
apt-get update
apt-get install -y apache2
MySQL
Installing MySQL is a bit of a pain because the installation is interactive, and so is securing it. Automating the installation can be done using debconf, which enables setting the prompt values ahead of time. Prompt values can be found using debconf-get-selections | grep mysql and set using debconf-set-selections.
# Install Debian configuration tool
apt-get install -y debconf-utils

# Configure MySQL prompt data with password "test"
debconf-set-selections <<< "mysql-server-5.5 mysql-server/root_password password test"
debconf-set-selections <<< "mysql-server-5.5 mysql-server/root_password_again password test"

# Install MySQL
apt-get install -y mysql-server-5.5
Post installation, the database should be secured using mysql_secure_installation. The mysql_secure_installation script cannot be automated using the same technique as it's a standalone script. It's good practice to run this script even if this isn't meant for production. As it's just a standalone script, it can be copied, modified and used separately. First copy it:
sudo cp /usr/bin/mysql_secure_installation /vagrant/
Now the prompts need to be removed and replaced with values, which are passwords and yes/no options. Instead of having the same passwords in both the bootstrap.sh and mysql_secure_installation.sh files they could and should be placed in a separate config file. This is useful if the Vagrantfile is checked into source control. It's not a great idea to ship passwords off to bitbucket/github, keeping them in separate file means they can be .gitignored. Anyone who wants to use it just needs to setup a config file with their passwords. Creating a simple config file goes like:
# Config file
# In vagrant folder
# mysql_secure_installation.conf
mysql_password="test"
mysql_change_root="n"
mysql_remove_anonymous="y"
mysql_disallow_remote_root_login="y"
mysql_remove_test_database="y"
mysql_reload_privilege_tables="y"

# Using the config file from inside mysql_secure_installation
source /vagrant/mysql_secure_installation.conf

echo "Password = $password"
echo "Change Root = $change_root"
PHP
Installing is simple. It's nice to add an index page with the PHP version info just to get started:
# Install PHP
sudo apt-get install -y php5 php5-mysql php5-mcrypt

# Enable mcrypt in Apache
sudo php5enmod mcrypt

# Change the order that Apache uses to execute files so that index.php is used over index.html
echo "<IfModule mod_dir.c>
    DirectoryIndex index.php index.html index.cgi index.pl index.php index.xhtml index.htm
</IfModule>" > /etc/apache2/mods-enabled/dir.conf

# Add PHP info landing page
echo "<?php
	phpinfo();
?>" > /var/www/html/index.php
PHPMyAdmin
Installing phpMyAdmin poses the same problem as MySQL. The installation is by default interactive and requires debconf.
# Configure PHPMyAdmin prompt data
debconf-set-selections <<< "phpmyadmin	phpmyadmin/dbconfig-install boolean true"
debconf-set-selections <<< "phpmyadmin	phpmyadmin/setup-password password test"
debconf-set-selections <<< "phpmyadmin	phpmyadmin/app-password-confirm password test"
debconf-set-selections <<< "phpmyadmin	phpmyadmin/password-confirm password test"
debconf-set-selections <<< "phpmyadmin	phpmyadmin/reconfigure-webserver multiselect apache2"

debconf-set-selections <<< "phpmyadmin	phpmyadmin/mysql/app-pass password test"
debconf-set-selections <<< "phpmyadmin	phpmyadmin/mysql/admin-pass password test"

# Install PHPMyAdmin
apt-get install -y phpmyadmin
# Add htaccess to phpMyAdmin
# Make password
apt-get install apache2-utils -y
htpasswd -b -c /etc/phpmyadmin/.htpasswd tom test

# Add the access rules to phpMyAdmin config file
echo "<Directory /usr/share/phpmyadmin>
		AllowOverride All
        AuthType Basic
        AuthName \"Restricted Files\"
        AuthUserFile /etc/apache2/.phpmyadmin.htpasswd
        Require valid-user
</Directory>" >> /etc/apache2/conf-enabled/phpmyadmin.conf

# Restart Apache
service apache2 restart
Complete provisioning file
# Remember this file is run as root by Vagrant
# Sudo is not needed

# Install Apache
apt-get update
apt-get install -y apache2

# Install Debian configuration tool
apt-get install -y debconf-utils

# Turn off user prompts
export DEBIAN_FRONTEND="noninteractive"

# Configure MySQL prompt data
debconf-set-selections <<< "mysql-server-5.5 mysql-server/root_password password test"
debconf-set-selections <<< "mysql-server-5.5 mysql-server/root_password_again password test"

# Install MySQL
apt-get install -y mysql-server-5.5

# Secure MySQL with non-interactive version
bash /vagrant/mysql_secure_installation_mod

# Install PHP
sudo apt-get install -y php5 php5-mysql php5-mycrpt

# Enable mcrypt in Apache
sudo php5enmod mcrypt

# Change the order that Apache uses to execute files so that index.php is used over index.html
echo "<IfModule mod_dir.c>
    DirectoryIndex index.php index.html index.cgi index.pl index.php index.xhtml index.htm
</IfModule>" > /etc/apache2/mods-enabled/dir.conf

# Add PHP info landing page
echo "<?php
	phpinfo();
?>" > /var/www/html/index.php


# Configure PHPMyAdmin prompt data
debconf-set-selections <<< "phpmyadmin	phpmyadmin/dbconfig-install boolean true"
debconf-set-selections <<< "phpmyadmin	phpmyadmin/setup-password password test"
debconf-set-selections <<< "phpmyadmin	phpmyadmin/app-password-confirm password test"
debconf-set-selections <<< "phpmyadmin	phpmyadmin/password-confirm password test"
debconf-set-selections <<< "phpmyadmin	phpmyadmin/reconfigure-webserver multiselect apache2"

debconf-set-selections <<< "phpmyadmin	phpmyadmin/mysql/app-pass password test"
debconf-set-selections <<< "phpmyadmin	phpmyadmin/mysql/admin-pass password test"

# Install PHPMyAdmin
apt-get install -y phpmyadmin

# # Add htaccess to phpMyAdmin
# # Make password
apt-get install apache2-utils -y
htpasswd -b -c /etc/phpmyadmin/.htpasswd tom test

# # Add the following the the /ust/share/phpmyadmin directory
# # In the phpMyAdmin config file
echo "<Directory /usr/share/phpmyadmin>
        AuthType Basic
        AuthName \"Restricted Files\"
        AuthUserFile /etc/phpmyadmin/.htpasswd
        Require valid-user
</Directory>" >> /etc/apache2/conf-enabled/phpmyadmin.conf

# Restart Apache
service apache2 restart

# Create softlinks for codeiniter and simple_api.php
rm /var/www/html/index.php
ln -s /vagrant/CodeIgniter-3.1.0/index.php /var/www/html/index.php
ln -s /vagrant/simple_api.php /var/www/html/simple_api.php
Simple PHP API
Check out this for a really simple CRUD API.
References